Cleanly Presenting Code Changes for a Beautiful History
Crosspost Note
This originally appeared on UserTesting's Engineering Blog.
Changes
We're developers; creating changes in code is what we do. Changes are incepted through many different forms:
- Every meeting
- Every whiteboarding session
- Every story
- Every bit of customer feedback
- Every bit of user testing (you are doing user testing, right??)
- Every bug painfully stepped through line-by-line
- Every performance problem meticulously benchmarked
.. but at the end of the day our work comes out as a set of changes... a diff.
Most of the time there will be a good mix of green and red in there; on good days there's greenfield feature that's all additions, and on very happy occasions there's stale code deletion that gives you a nice diff full of red, but most of the time it's a mix of additions/deletions/changes.
Presenting Changes for review
Since it's 2016, it's probably safe to say you have a continuous integration/delivery system set up - if you don't, stop reading this right now, and get setup with Circle, Travis, Jenkins, or any CI/CD system!
This means that once your changes have passed whatever automated checks are in place (unit tests, integration specs, style), your changes are a single click on a big green button away from deploying. Code review is a common practice that allows your coworkers to examine the changing code for various reasons:
- To spot any spot mistakes
- To offer alternatives/improvements
- To learn from you
- And to just be aware of the changing code
This becomes a crucial point - this is the place where code goes from something only you have looked at on your laptop, to something you're presenting to your team just before it goes live.
Because of this, let's take pride in our craft and work to present those changes as cleanly as possible!
Examples
Following are two hypothetical (and admittedly contrived) examples that represent the extremes on different ways pull requests are presented. Both represent the same ultimate difference in code; the same lines would change in the same places, and the diff would be the same; the only difference is in the way it's presented.
Non-so-clean Pull Request
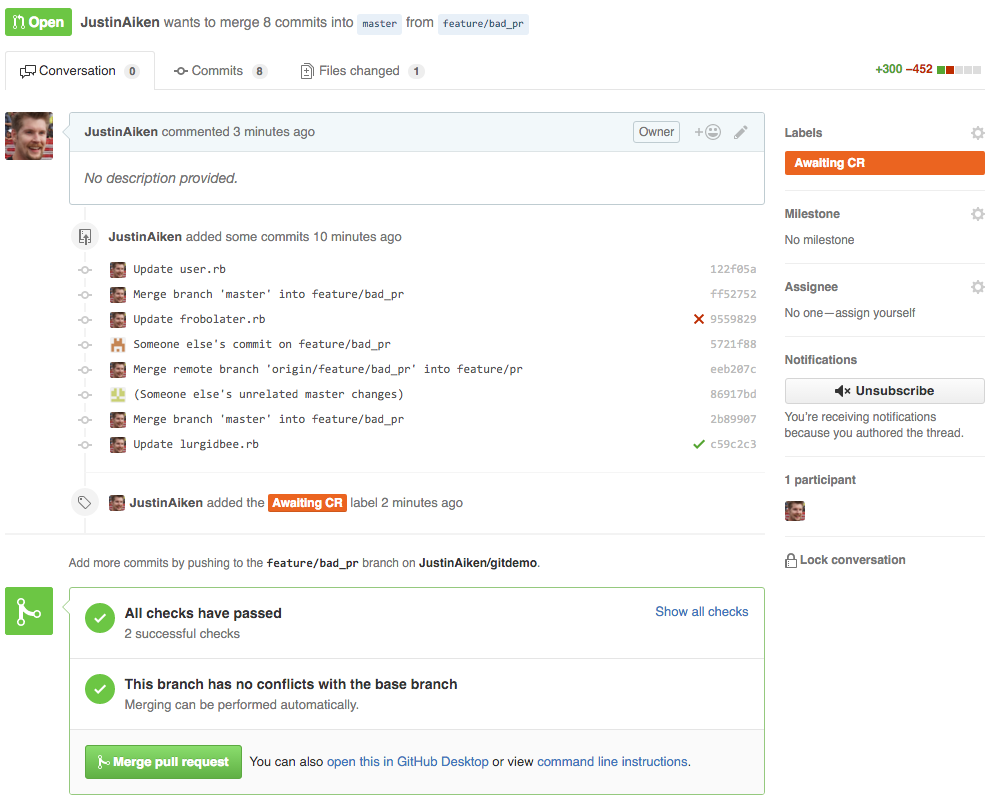
- Pull Request description tells you nothing
- Individual commits have a generic message
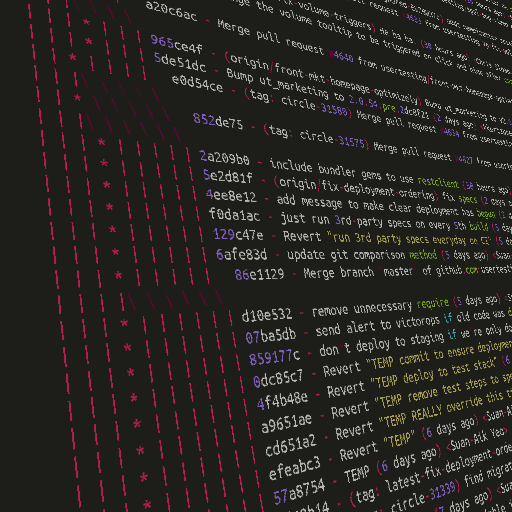
- Unrelated changes are conflated through merging
masterin - Extra merge commits on the same branch are present
Clean Pull Request
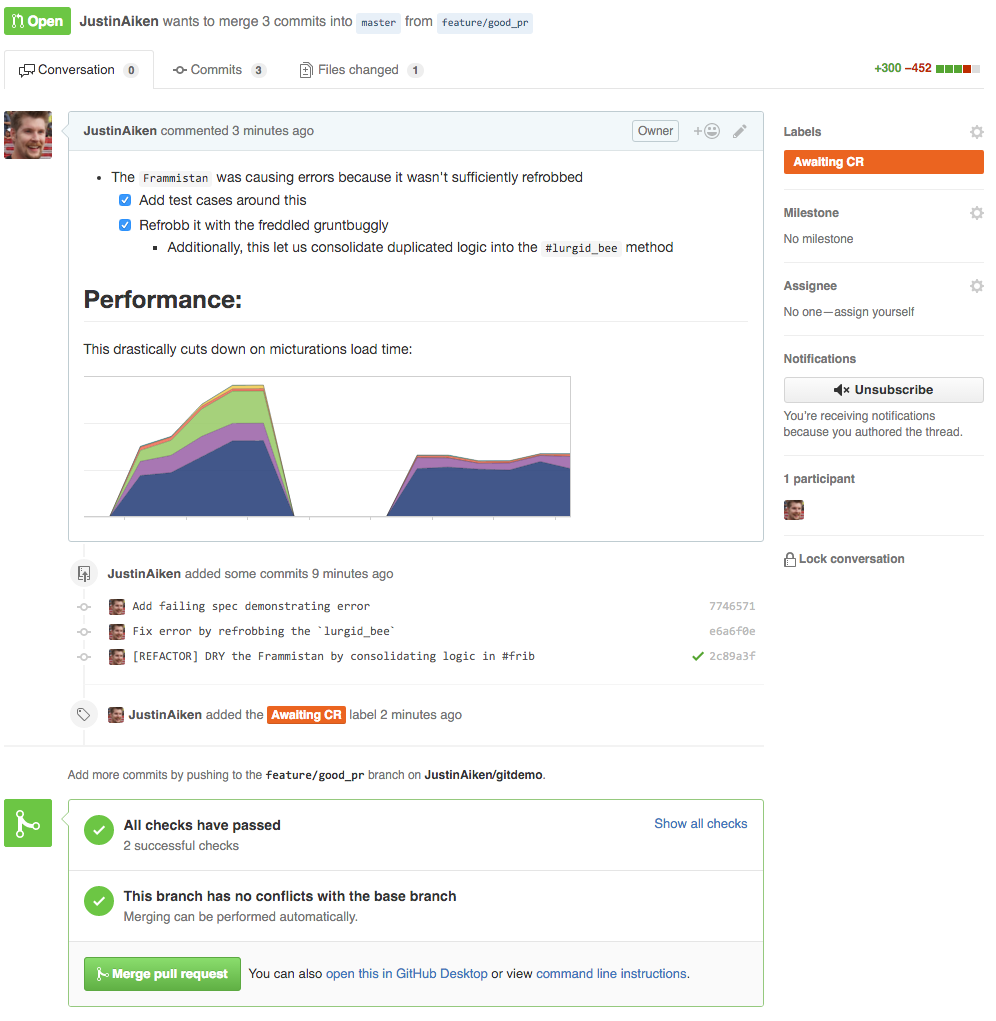
- A nice description is written about what's changing (and why!)
- Helpful charts/diagrams are included
- Only relevant files are committed
- Commits are logically ordered to tell a small story
4 Steps Towards a Cleaner Pull Request
If you're convinced that the first example is cleaner than the second - or at least parts of it, then keep reading! We're going to talk about four steps towards the clean example - and talk about tradeoffs when you might not want to!
Step 1 (Easy): Pull Request Description and Commit Messages
This one's very straightforward - there's no tradeoffs other than the time it takes, and it makes everything more clear. Trust me - no matter how self-evident you think your changes are - when someone else is the next person to see that file, and they don't understand it, and all git blame tells them is that you updated the file; you'll leave them confused.
Take the time to write about what you're doing! Github has tried to encourage this in Pull Requests descriptions by adding Pull Request Templates, something that we've found to greatly help the number of clearly written Pull Requests at UserTesting.
Step 2 (Fairly easy): Merges on the Same Branch
If you're not the only one working on a feature branch, occasionally you'll find a git push rejected with this message:
error: failed to push some refs to 'git@github.com:your_org/your_repo'
hint: Updates were rejected because the remote contains work that you do
hint: not have locally. This is usually caused by another repository pushing
hint: to the same ref. You may want to first integrate the remote changes
At this point, if you do git pull followed by git push, you'll end up with that ugly extra merge commit. Instead, do git pull --rebase; this will simply apply your commit(s) after the other(s), avoiding any oddities. In the case that there's merge conflicts, you simply resolve the exact same way you would with a traditional merge. Often, there's no conflicts at all - so there's no reason at all to have a 'merge bubble' just because someone else updated the README before you updated something else!
Step 3 (More involved): Staying Up to Date with Master
If you have a long lived branch, you're likely to diverge from master (or your integration branch if you're using a form of gitflow). The easiest way to handle this is just to merge master into your branch.
A cleaner way though, is to git rebase master from your feature branch. Based on the differences, this can be beyond simple, or get quite complex. If you're working in a different area of your application, there may be superficial differences - often doing git rebase master will fly through with no manual intervention required. Other times you will have to step through the commits, resolving conflicts as they come up. If you get conflated or panic, you can always git rebase --abort to give up and merge master in.
NOTE When doing this - whether it was easy rebase with no conflicts or a hard one, you will have to force push your changes over the original. Because of this, some people have reservations about this approach. If you're working on a branch with others, make sure to communicate with them about what you're going to do. When force pushing, either use git push --force-with-lease, which will only force push if there haven't been new changes since your last fetch, or manually check.
Step 4 (Advanced): Rewriting Your History
If you have strong git-fu, you can always rewrite your history completely with git rebase -i. You can turn 50 'WIP' commits into a logical story that provides maximum context for others to read through. This doesn't necessarily mean squashing everything into a single commit; often it is quite revealing to have a failed approach committed, followed by a commit that approaches the problem a different way. But being able to take an arbitrary amount of commits in a branch, and reorder/squash/pick apart your work to present it in the most clear light is one of the most useful things you can do for your coworkers - much more helpful than leaving random half-hearted comments in the code! This is a skill that takes time to learn though - it's been said:
And then there’s
git rebase --interactive, which is a bit likegit commit --amendhopped up on acid and holding a chainsaw–completely insane and quite dangerous but capable of exposing entirely new states of mind.
- Only do this if you know what you're doing!
- This will totally mess with your feature branch if anyone else is working on it - triplecheck with them that pushing your clean history is okay!
- And never do this on
master. Ever. Not even for that one exception you're thinking of.
Start out simple! Next time you want to do git commit --amend (because "fix typo" commits aren't very useful!), try doing git rebase -i HEAD~2 and squashing them there instead. Or simply reorder 3 commits. Remember, you can always git rebase --abort your way clear. If you're new to interactive, here's some tutorials to get you started:
- Thoughtbot - Rewriting History
- Ry's Git Tutorial - Rebasing
- git ready - squashing commits with rebase
Conclusion
By taking the time to write your descriptions and messages clearly, and applying the right amount of care when working with source control, you can present changes in the best light possible for initial review, and leave a helpful history others will be able to reference for years to come.

I'm a Ruby/Rails developer currently working for UserTesting, living in Southern Utah. More about the author →